Back to Top
Crocus Hort Tips
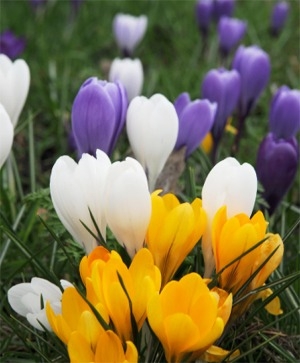
Heirloom Crocus
If you are looking for heirloom flower bulbs, we carry several varieties of Crocus that would classify as heirloom. Sadly, the original Crocus tommasinianus is no longer grown commercially. If you need more heirloom options, please visit Old House Gardens.
1925 C. tommasinianus Roseus
1665 C. flavus Golden Yellow
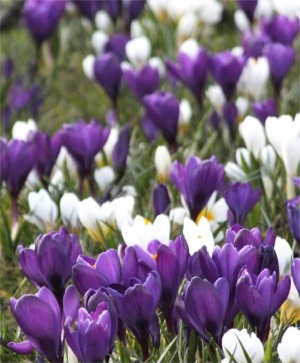
1958 C. vernus Flower Record
1943 C. vernus Jeanne d’Arc
1934 C. vernus Vanguard
Horticultural Zone Hardiness
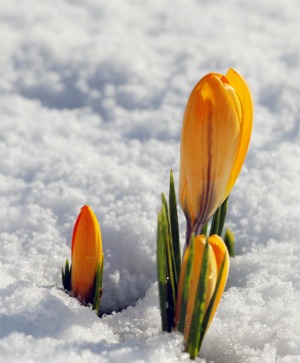
As a rule, all Species Crocus and Dutch Large Flowering Crocus are hardy in horticultural zones 4 through 8. If your garden is in a horticultural zone that is either too cold or only marginally suitable, you may want to apply no more than a 2" layer of mulch after the ground surface freezes in the fall. The mulch should trap the cold temperatures into the soil, not warm temperatures. Mulch helps to protect the bulbs from arctic temperature spikes over the winter. Good mulching mediums include straw, salt marsh hay or oak leaves. In the spring, you can loosen the mulch in the area in which the Crocus will be sprouting. (Mulching lawn installations is not necessary or recommended.) Crocus normally survive late spring snow storms, so no worries.
 Bulb Inspection
Check your shipment against the packing slip and make sure that everything is as it should be. Occasionally, bags of smaller bulbs like Crocus may be placed in the inner boxes of other bulbs to reduce jostling during shipment. So if you can’t find something, open all of the inner boxes. If there is a discrepancy, please call us immediately so that we may resolve it with you. Since every bag or box of bulbs in your order has been scanned using its UPC barcode, we can usually tell you in which box each variety is located.
Inspect your bulbs carefully. We make every effort to ship you only healthy, firm, top quality bulbs.
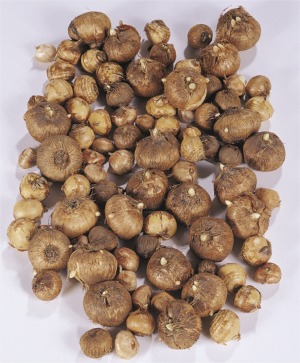
Crocus bulbs look different from other types of flower bulbs. Crocus bulbs are really corms, with either a smooth (annulate) tunic or a fibrous (reticulate or netted) tunic. It is natural for some types of bulbs to develop a transportation mold: a natural gray-blue-green mold that occurs when they are exposed to air. This mold disappears as soon as the bulbs are planted. The soil wicks it away. If you prefer, you may spread the bulbs out in the sun or brush it off with a paper towel, although it is not necessary.
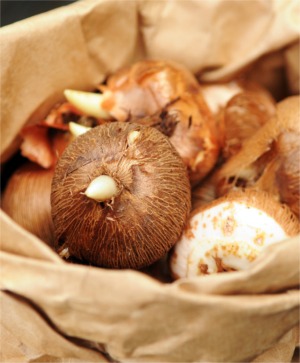
Little cuts, scars, discolored exteriors and dimples are normal marks from the flower bulb harvesting, cleaning and sizing processes in the Netherlands. Some bulbs may have a fully intact, papery skin while others have partial skins, and others may be skinless. The existence or condition of the bulb skin has nothing to do with the performance of the bulb. The most important factor is the way that the bulb feels. As long as the bulb is firm, it is a good and viable bulb. Some bulbs may already have tiny baby bulbs developing on the basal plate (root base) of the bulb while others may even have a little top shoot. Little noses or top shoots are not uncommon on Crocus bulbs. Some bulbs are prettier than others, but you can rest assured that all of the flowers will be gorgeous!
Bulb Size
Species or Botanical Crocus naturally make a smaller top size bulb (corm) than the Dutch Large Flowering Crocus. Top size Species Crocus corms are 5 centimeters/up while the top size Dutch Large Flowering Crocus corms are 9 centimeters/up. If you find that there are varying sizes of corms in one bag, the smallest of the corms is, at a minimum, the top size specified for that variety. The corms are sized on conveyor belts in the Netherlands that have holes that are the centimeter size specified as top size. Smaller bulbs fall through these holes and are not included in our stock. All of the larger corms are included in our stock, and, as a result, there can be size variation because some corms are larger. (If any variety in our collection produces a smaller top size bulb from the annual harvest than expected, we will note it on our website. If a price change occurs as a result, we will post the new price and make an adjustment on every order.)
Bulb Storage Before Planting
After you’ve received your order and inspected it, keep the exterior carton and the inner boxes open to give the bulbs some air. All bulbs love good air circulation. Store them in a cool, dry place with low humidity, away from heat, frost and strong sunlight at about 50°F to 70°F. Never put flower bulbs in the freezer! Poor storage conditions could cause bulbs to dry out, or to become moldy.
 Select and Prepare the Planting Site
For Species or Large Flowering Crocus, one should calculate planting about nine bulbs per square foot. Square footage is determined by multiplying the planting site’s length by its width.
All Crocus require neutral pH, well-draining soil in full to partial sunlight. The best soil is a sandy loam. For clay soil, break up the clay about a foot deeper than the planting depth of your bulbs and amend the bed with sand, peat moss and well-aged neutral-pH compost. For excessively sandy soil, amend the bed with peat moss and aged leaf compost.
Please do not ever add horse manure, chicken droppings, mushroom compost or other hot manure or compost to your flower bulb beds. If you would like to add compost you’ve made yourself, please make sure that it neutral pH and completely decomposed and healthy. Partially decomposed compost can spread pests and fungal disease. What is good for vegetables is not necessarily good for flower bulbs.
Species Crocus are the best for lawn planting (see below). The best lawns for Species Crocus tapestries are those in dappled sunlight under deciduous trees because the grass is usually less densely matted and vigorous, allowing the Crocus corms to develop mature root systems and corm offsets so that they may naturalize and flourish over time.
 Crocus, Squirrels and Chipmunks
Sadly, squirrels and chipmunks love to eat Crocus corms and may dig up newly planted corms for an immediate snack, or for hidden transplant somewhere other than where you planted them. It is not the kind of garden surprise party that we like. Many people report that squirrels and chipmunks don’t like to eat Crocus tommasinianus hybrids as much as other Crocus. It is worth a try. Unless one is planting a huge Crocus tapestry installation, try outsmarting the squirrels by planting the Crocus later, shortly before the surface of the ground freezes, or place a piece of fine mesh chicken wire over the surface of the bed. Remove after soil freezes.
Planting Crocus in Garden Beds
Crocus corms are easy to plant and are low maintenance. Crocus should be planted once the ground has chilled down to about 55°F, after around two weeks of sweater weather when night time temperatures have hovered in the 40s.
Plant Species Crocus corms 4" deep and 3" to 4" apart. We do not recommend planting them closer together. Crocus are good naturalizers and readily multiply by corm offsets: these are the baby corms that develop on the sides of the mother corm that you originally planted. Sometimes, when mature and happy over time, Crocus may even multiply by self-sowing seed.
Please do not put anything in the bottom of hole that you’ve dug for the bulbs. Nestle the bulb into the hole, fill in the hole with soil to the level of the bed, and tamp down the soil lightly, making sure that individual holes are no longer apparent and that the garden bed surface is level. This will help to prevent water from filling up any of the individual planting holes. All flower bulbs hate to get wet feet.
If you would like to do a layered or lasagna planting, first plant the Narcissi or Tulips to the proper depth and spacing, then cover them with enough soil to bring the Crocus planting depth to 4" or 5". Then, place all of the Crocus corms over the surface (3" to 4" apart) and cover them with soil even to the surface of the bed.
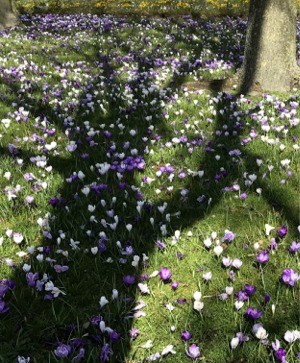
Planting Species Crocus in Lawns
We recommend that only Species Crocus be used for grass lawn installations because they bloom about two weeks before Dutch Large Flowering Crocus, because the corms are smaller and easier to plant, and because they do best over the long haul. Some say that Crocus tommasinianus cultivars, commonly referred to as Tommies like Barr’s Purple and Ruby Giant, are best for lawn plantings because they appear to not be the preferred bon bons for squirrels and chipmunks.
Again, the best lawns for Crocus tapestries are those in the dappled sunlight of deciduous trees: extremely dense grass lawns, normally in full sunlight, can strangle the growth of mature root systems and corm offsets, inhibiting naturalization. Depending on the density of the lawn’s grass, one may use a dibble or a small, sharp trowel to plant individual Crocus corms. If one is contemplating a large lawn installation, use of a sod cutter is an option. In sections, cut the sod on three sides, lift it up, position the Crocus corms and replace the sod.
After the beautiful lawn tapestry blooms, one must wait anywhere from five to seven weeks to mow the lawn: the foliage must die back naturally to permit maximum photosynthesis to nourish the Crocus corms so they may naturalize and thrive for future years of blooms.
Give your Crocus lawn tapestry priority treatment over the grass. Which means, do nothing. Do not rake up the lawn in the spring after the sprouts emerge, do not aerate the grass, do not apply any chemicals and do not install underground water sprinklers. Most of all, do not mow the lawn until the Crocus foliage has virtually disappeared. Just don’t look at it for a while after the Crocus bloom.
Stinze-Style Lawn Plantings
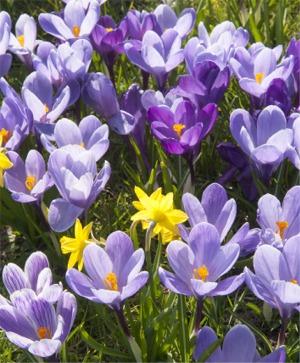
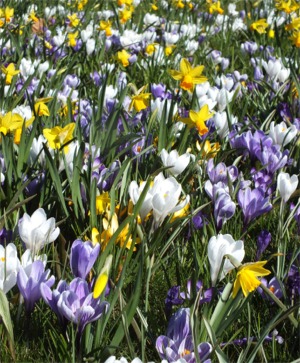
In the northern area of the Netherlands, primarily in the provinces of Friesland and Groningen, centuries-old stately homes often feature front lawns under deciduous trees carpeted with a succession of blooming flower bulbs. Those most commonly seen include Galanthus, Eranthis, Iris reticulata, Species or Botanical Crocus, Dutch Large Flowering Crocus, miniature Narcissi, Species Tulips, Scilla and Fritillaria meleagris. These Stinze lawn gardens have naturalized over the centuries: the grass is not mowed until July some time, if at all.
Fertilizing
Never put anything, including fertilizer, in the bottom of each bulb planting hole. Plant the bulbs to the proper depth and spacing, tamp down the soil and broadcast a 5-10-5 or 4-10-6 granular organic fertilizer over the surface of the bed as if you were feeding the birds.
While all flower bulbs are nature’s perfect little packages and will bloom beautifully the first year, we recommend broadcasting fertilizer three times a year for all perennial and naturalizing flower bulbs. First at the time of fall planting to help grow the roots, second when the sprouts emerge in the spring to help nourish the foliage and flower, and finally when the flowers start to die back, to help feed the bulb itself. Bone meal is incomplete nutritionally and can attract animals to some varieties of bulbs.
Do Not Plant in Exterior Containers or Raised Beds
Flower bulbs should never be be planted in outdoor containers, window boxes or raised beds where bulbs experience temperature spiking and repeat cycles of freezing and thawing. This results in root growth failure, root system destruction, frozen bulbs and/or bulb rot from poor water drainage. Flower bulbs must have a consistent cold winter temperature with good water drainage in order to produce a mature root system that will permit foliage growth and flower production in the spring.
Bloom Times, Size and Color
The bloom time listed for each variety is for horticultural zone 5 in normal spring conditions. The warmer the horticultural zone, the earlier Crocus will bloom in the Spring. The colder the horticultural zone, the later Crocus will bloom in the spring.
Flower bulbs do everything in response to temperature, sunlight and site conditions. Bloom times, heights and colors are approximations affected by temperature and site conditions regardless of the calendar date. If it is a warm spring, bulbs will bloom earlier. If it is a cold spring, bulbs will bloom later. If it is a long cool spring, followed by rapid warming, you may find odd bedfellows: earlier blooming Galanthus flowering right along side later blooming Crocus, Species Tulips and Narcissi. Each spring can offer a different sort of garden surprise party.
In the event of a mild winter or a warmer-than-usual spring, Crocus that have emergent stalks with set buds may bloom early, small and short, although they will likely grow taller and larger as long as temperatures moderate. Temperature spikes can also affect mature root development, the actual form of the flower or the process of flower color maturation.
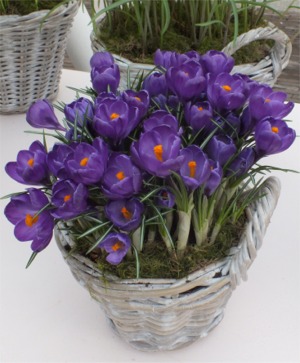
Forcing
All Crocus corms are good for forcing indoors over the winter. In mid-October, pot them up and prechill them at a consistent, dark 38°F to 45°F with moderate watering for eight to ten weeks. Bring them out of refrigeration into progressively stronger sunlight with moderate watering. They usually bloom around four weeks later. Once the corms are forced, their vitality is spent and the corms may be discarded.
Trouble Shooting
If Crocus are yielding more foliage than flowers, it indicates a root system issue. A mature planting may need to be dug up in the fall and transplanted to the original depth and spacing after carefully separating the bulbs that may have been strangling themselves. In the case of a lawn planting, it could indicate that the grass is too heavily matted and that it is choking out the Crocus. This is most likely the case in heavily fed lawns in full sunlight with particularly rigorous grass strains.
Crocus factoid: Meaning saffron in Greek, Crocus sativus (not in our collection) is the variety used for the collection of saffron, the expensive spice threads that are the flower’s stigmas. One would need 75,000 flowers to yield just one pound of saffron!
