Back to Top
 AMARYLLIS: THE ART & SOUL OF WINTER
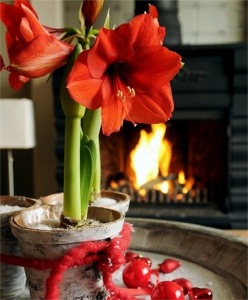
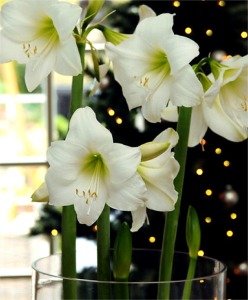
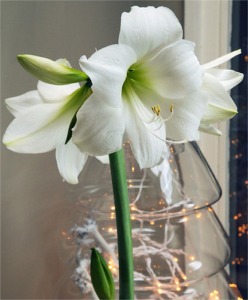
Nothing brings more joy, color and song to our spirits than huge Amaryllis flowers over winter's long, dark days. Amaryllis are the Art and Soul of Winter™.
Holiday or Winter Blooming?
If you want your Amaryllis to bloom for the holidays, please choose from among our Christmas Flowering Amaryllis, grown in South Africa in the southern hemisphere. They will also bloom after the holidays, but they are the only varieties that will reliably bloom for the holidays. Christmas Flowering Amaryllis usually take four to six weeks to bloom once potted. Royal Dutch Amaryllis grown in the Netherlands in the northern hemisphere usually take eight to twelve weeks to bloom once potted.
All of our Christmas Flowering Amaryllis are bareroot bulbs, meaning that you pot them up yourself in your own pots. If you intend to start an Amaryllis bulb in a special pot as a holiday gift for a friend, choose a Christmas Flowering variety. Amaryllis are tender bulbs. When delivering your Amaryllis gift, protect the tender buds from a cold shock by covering the potted plant with a loose plastic bag.
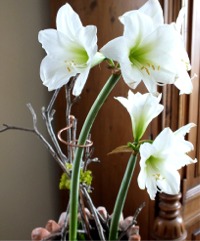
All of our Royal Dutch Amaryllis are bareroot bulbs for vibrant, large blooms after the holidays. Our attractive Art & Soul of Winter™ Amaryllis Gift Boxes include a 30/32 cm. Royal Dutch Amaryllis bulb, a green plastic pot, lid and saucer, potting medium and horticultural tips.
Inspect the Bulbs
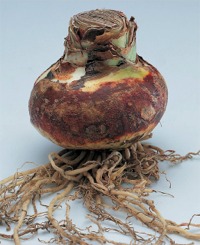
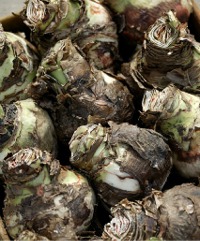
Once you receive your order, open the exterior carton and interior boxes to give the bulbs air ventilation. Gently inspect the bulbs. The healthy outer skin of Amaryllis bulbs may appear papery, shriveled or rust-brown from having been washed and dried after harvest. It's all good, all natural. Bulbs are sized when they are harvested. They shrink naturally as they dry, and plump up again once potted and rehydrated. Each variety has a varied amount of existing roots.
Keep in mind that top size Christmas Flowering bulbs are always smaller than top size Dutch Amaryllis bulbs. They have been hybridized to create well-proportioned plants and large flowers from smaller bulbs (better crop yields and lower shipping charges for the boat ride half way around the world from South Africa). Bulb circumference size is measured around the widest girth of the bulb (not from left to right).

Storing the Bulbs Prior to Potting
Christmas Flowering Amaryllis are best potted through February and Royal Dutch Amaryllis are best potted through March for optimal root growth and performance. Prior to potting, store the bulbs at about 50°F. Colder temperatures could damage bud development. Warmer temperatures could initiate sprouting and growth even before the bulbs are potted. The ideal humidity level to keep the roots healthy and pliable is around 65%.
Potting the Bulbs
Pot individual bulbs in well-draining, cozy pots in sterile, neutral pH potting soil with at least the top quarter or third of the bulb above the surface of the soil to avoid water collection in the sprout. A cozy pot means that there shouldn't be much more than about an inch of space between the bulb and the pot. Amaryllis flower better when their roots are pot bound. Tamp down the soil lightly. Give the bulb one drink of room temperature water around the base of the bulb. Place the pot in direct sunlight at room temperature with good air circulation and normal to low humidity. Avoid placing the pot in an area with cold drafts. Do not water again until green growth appears. Over-watering could inhibit root and plant growth.
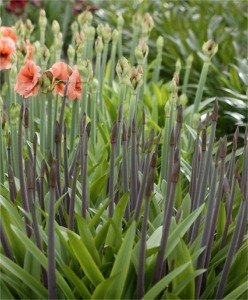
Once the Amaryllis starts to grow, water evenly and consistently around the base of the bulb at soil level (never mist). Make sure to discard any collected water in the pot saucer to avoid root or bulb rot. Brighter sunlight creates the best coloration and a more proportionate plant (read: shorter stem). Most varieties yield two, and sometimes even three, flowering stems in succession. Sword-like foliage may appear before, during or after flowering. You may need to install structural support for the huge flowering stems. We like to make pot-size teepees from twisted twigs and branches we've collected in the woods to secure the Amaryllis stem's growth and help to keep it balanced in its pot. You may also top dress pots with stones to weigh down the pot to prevent it from tipping over when the plant is in full bloom. If they grow too tall, you may cut them: Amaryllis are among the best, most long-lasting of cut flowers. After the flowers have faded, cut them off to prevent unnecessary seed formation, but leave the stalk in place to die back naturally. It helps to feed the bulb.
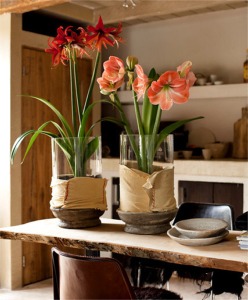
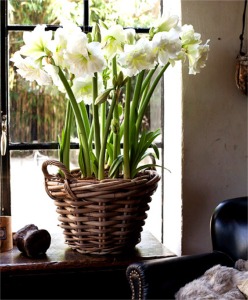
If you want to display more than one Amaryllis together, we suggest sinking individual pots at the same rate of growth in a basket or cachepot. The pots can be covered with green Spanish moss or preserved reindeer moss. It looks beautiful, and the Amaryllis may still be grown in cozy pots that is best for them from a horticultural perspective.
Growing Amaryllis in Pebbles and Water
Truth be told, we're kind of old-fashioned, and don't prefer to grow Amaryllis in pebbles and water, but it can be done. If you intend to do this, please consider how tall Amaryllis stems stretch, and how heavy their flowers become. Choose a sturdy container that is more like a big glass hurricane candle cylinder than a vase (no pedestal or foot). Nothing too fragile or tippy. The general method is to place about four inches of river stones in the bottom of the cylinder and to place the Amaryllis bulb, roots down, on top of the stones. Then, carefully fill river stones in around the bulb and over the bulb, leaving the top quarter of the bulb uncovered. Very carefully add water, making sure that no water collects in the sprout, or nose, of the bulb. Only fill the cylinder with two or three inches of water because the water cannot touch the root base of the bulb or it will rot. You must keep the water level even and consistent and must never allow the roots to dry out. The water can become funky as old roots decompose. Amaryllis grown in water are not suitable for more than one season of growth and should be discarded after blooming.
Amaryllis Cut Flower Tips
Amaryllis are one of the best, most long-lasting cut flowers of all time. The best time to cut an Amaryllis stem is when all of the buds on that one stem have begun to color up. Cut Amaryllis vase life is longer if the ambient room temperature is around 60 for the better part of the day: stems can last a good ten days, close to two weeks!
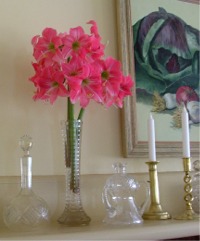
Around the holidays, long stems of blooming Amaryllis are incredibly beautiful in large vases on the floor. Table top arrangements call for shorter stems. Short stalks are beautiful in glass vases filled with clear or colored glass marbles, fresh cranberries or small pine cones. Individual flowers can even be snipped for individual bud vases to adorn the center of a dining table. We love to grow Royal Dutch Amaryllis for winter parties, and for Valentine's Day. If you're growing pots of Amaryllis and one or two of them become too tall or leggy, don't hesitate to cut the long stem and use it as a cut flower. But do keep the pot going for a second, and sometimes even a third stem!
Growing Amaryllis for Multiple Seasons
To hold Amaryllis over for subsequent years of bloom, cut off the flowers once they have died back but leave the stalk in place to die back and nourish the bulb. Place the pot in bright sunlight so that the foliage has a prolonged period of photosynthesis for optimal chlorophyll production. When nighttime temperatures are reliably above 60°F, Amaryllis pots may be brought outside and hardened off: this means to gradually introduce brighter outdoor sunlight to the potted Amaryllis. First, place the pot in the shade, then in filtered sunlight, and finally in a spot with at least six hours of sunlight. It's best to sink the pot into the soil to protect the bulb and root system from temperature spiking. Fertilize the plant every four weeks with a diluted houseplant fertilizer. Water regularly through mid-July. Do not cut back the foliage.
Although most Amaryllis will flower on and off again without a dormant period (this is referred to as growing them as evergreens), one can control the bloom time by forcing it back into dormancy. In mid-July, store the potted Amaryllis plant in a dark, relatively dry spot like a basement. You may want to put the pot on its side so that it is not accidentally watered. The lack of water and darkness will cause the bulb to go back into a dormant state. The foliage will slowly die back with all of its nutrients seeping back into the bulb to nourish it for future growth. In late October, after about 12 weeks of rest, the pot may be brought out, the dead foliage can be removed and the soil can be refreshened. All you need to do to start the whole process over again, is to give the plant a drink of room temperature water. If you find that the foliage has not died back, it's likely because the storage site was too humid. If this happens, the Amaryllis will likely not bloom again. Please note that this is not a guaranteed or foolproof process. Since Amaryllis bulbs perform best when pot bound, repotting Amaryllis bulbs as they grow larger is usually only necessary every three to four years. The best time to repot them is in October, when you are bringing them out of dormancy. If the Amaryllis pot has been outdoors, please examine the soil to make sure that it is clean, healthy and bug-free before bringing it indoors.
Growing Amaryllis Outdoors
If you live in horticultural zone 9 or warmer, you may grow Amaryllis bulbs outdoors in the garden as long as there is absolutely no chance of even a light frost. They require well-draining, neutral pH soil, at least six hours of bright filtered sunlight and good air circulation. In the late fall, plant the bulbs with the neck of the bulb at, or just a little higher, than the soil level, spaced 12" to 16" apart. Water lightly after planting. If it hasn't rained, wait until green top growth appears to lightly water the bed. If the surface of the bed has dried out and rain is infrequent, lightly water. Top dress the Amaryllis plantings with a monthly application of a 10-10-10 fertilizer after foliage appears. Amaryllis bulbs should not be planted in areas with in-ground irrigation systems. From July through October, do not supplement rainfall with watering. Cut back and remove any yellow or dead foliage.
Trouble Shooting
If an Amaryllis bulb is slow to wake up out of dormancy, apply bottom heat by placing the pots on a seed growing mat, heating pad or food warmer, or place the pot over a radiator (never on a stove top). Double and Miniature varieties may pop out of dormancy more quickly than Single varieties.
Stunted plants, flowers growing on short stems (out of their necks) and poor flower formation are usually caused by excessive watering prior to the initiation of top growth, nutrient-poor soil, improper storage conditions, and by under or over watering during plant growth.
If you've had your Amaryllis plants outside and the foliage has become wilted, yellow or deformed, it's possible that outdoor insects, like the narcissus bulb fly, found their way into the pot's soil, and into the bulb. If this has happened, it's best to destroy and remove that Amaryllis bulb from your collection.
If red spots appear on flower stalks and leaves and the plant appears to be deformed, it might be signs of a fungal disease called Red Blotch, Red Fire or Stagonospora curtissi. Dutch and American agricultural inspectors are incredibly fastidious in their examination of Amaryllis bulbs to make sure that they are disease-free prior to export. The use of sterile potting soil, good air ventilation, bright sunshine and only moderate, soil-level watering helps to reduce the chance of fungal disease. Plants brought outside during the summer and kept in shade, high humidity and/or over watered may be susceptible to fungal disease development. Infected plants should be removed and destroyed. Red Fire blotches are completely different than the superficial rust-brown mark or red streaks on Amaryllis bulbs that occur during the harvest and washing process. If an Amaryllis bulb gets nicked or bumped during the harvest process, the flesh may develop a shallow, external red mark that has nothing to do with Red fire fungal disease. Harvest marks or discoloration from washing and drying are natural and not harmful to the bulb or its performance.
